In recent posts, I’ve discussed recording macros, fixing recorded macros, and even using someone else’s macros. To run a macro, you have a few choices.
- Tools menu > Macro > Macros, select the Macro, and click Run
- Shortcut Key combo Alt+F8, select the Macro, and click Run
- Run Macro button on the Visual Basic toolbar, select the Macro, and click Run
- Click in the macro with the mouse and press F5
None of these techniques are particularly elegant, and you wouldn’t want to email a file with a few macros to a colleague and tell them, “Okay, go to the Tools menu, select Macro, then select Macro, then click on MyFirstMacro in the list, and click Run.” It would be nice to just tell them, “Click the First Macro button.”
You can assign a macro to a few types of objects:
- Forms Menu Button or Shape
- ActiveX Button
- Menu or Toolbar Button
In this post we’ll look at using a Forms menu button to run our macros. We’ll use this simple macro for our example.
Sub HelloWorld()
  MsgBox "Hello, World!   ", vbExclamation
End Sub
When it is run, we see a simple message.

Forms Menu Controls
First make the Forms toolbar visible. Like so many other things in Excel, there are several ways to accomplish this.
- Tools menu > Customize > Toolbars tab, check the box in front of Forms
- View menu > Toolbars, select Forms from the list
- Right click on the menu and toolbar area, choose Forms from the list
The Forms toolbar will appear.

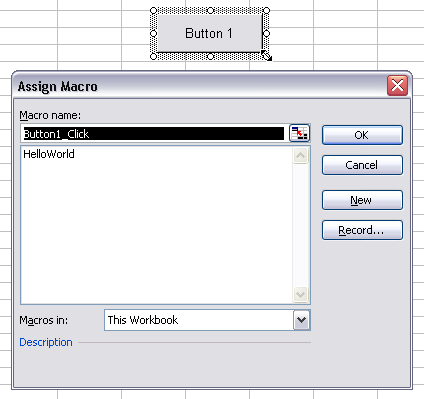
Select the Button button, then draw a rectangle in the worksheet where you want to place the button (you can move and resize it later). The Assign Macro dialog pops up with a list of macros in the active worksheet for you to select from.

Select a macro and click OK, or Cancel (you can select a macro at a future time). You can edit the text of the button after you dismiss the dialog, or right click on the button any time.
You can assign a macro to any of the Forms toolbar controls.
Shapes
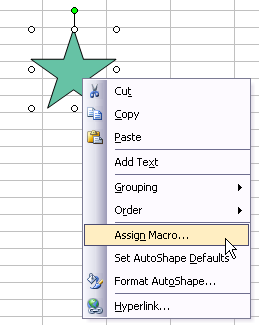
You can assign a macro to any shape (including any chart) on a worksheet. Right click on the shape, choose Assign Macro, and follow the steps above.


