Excel has a handy little feature that lets you quickly fill in a list of items, and even sort by that list. There are a handful of built-in lists, and Excel lets you define your own custom lists.
I’ll show how these lists work with the built-in lists, then I’ll show how to add your own custom lists. Finally, I’ll share a little program that I’ve built to manage some specific custom lists that I use frequently.
Built-In Lists
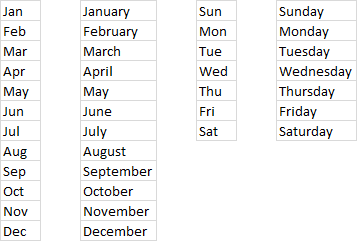
Say you want a list of months. Type “Jan” into a cell, then drag the handle at the bottom corner of the cell. Excel extends the list to fill the cells included in your drag. You can drag to fill Jan to Dec, and if you go past Dec, the list continues again with Jan. And you don’t need to start with Jan, you can start anywhere in the list, and Excel is smart enough to fill it.

There are other tricky fills you can perform with lists. You can enter Jan into a cell, and drag upward, and Excel will fill backwards. You can enter Jan and Apr into two cells (the first months of quarters 1 and 2), then select the two cells and drag, and Excel will continue to fill with Jul and Oct (the first months of quarters 3 and 4). You can enter two months in reverse order (Dec and Nov below), select the two months, then drag to fill in reverse order.
In the figure below, I illustrate horizontal fills with the built-in list of days of the week.

Another smart thing about lists is that Excel picks up the capitalization of the first item and applies it to the other items in the filled range. Below you see how Excel has filled with initial caps, all caps, and no caps.
Excel has four built-in lists you can use: month abbreviations, month full names, day of week abbreviations, and day of week full names.
Hidden Lists
In addition to the built-in lists shown above, which can be viewed in the Excel user interface (described later), there are numerous other lists that just seem to work.
Numbers themselves can act as a list. If you select a number (first example below) and drag it, you simply get a string of that number. Not very useful. But if you select an adjacent cell, like the blank in the second example or the random text in the third, the blank or random text are repeated, while the number increments. If you select the first two numbers in a sequence, dragging will continue the sequence. If the numbers are not consecutive, the sequence continues with the same spacing as in the initial selected values.
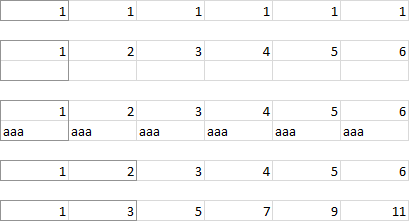
If you select more than two initial numbers, extending the sequence will fill in values from an extended trendline, as if they were computed using TREND() or FORECAST().

If the starting value is an arbitrary string that ends with a number, extending the list appends sequential numbers to the string. If two values are selected, then the extended sequence uses the spacing between the selected values.

In addition to the built-in lists based on Day and Month names, there are several other interesting date-based sequences. Selecting and dragging a date fills the range with subsequent dates. No need to select a helper cell as with regular numbers. Selecting two dates defines the spacing of the generated sequence.

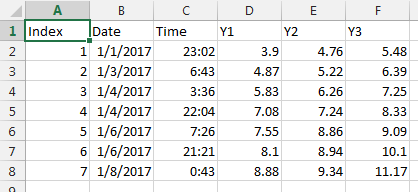
It works with times, too.

You can use Q1, Qtr 1, or Quarter 1, and the sequence will generate the quarters of the year. It’s smart enough that after the fourth quarter, Excel starts counting again with the first quarter (presumably of the following year).

Another neat sequence is with ordinal numbers.
![]()
Sorting with Lists
Just as you can sort numerically, you can also sort with lists. Below is a small Table with a column of month abbreviations. They are listed in the least useful sort order, alphabetical. If I click on the filter dropdown in the Table header, I have choices to sort A to Z or Z to A. Using Sort A to Z is probably how the months ended up in this unfortunate order.

But if I go to the Home tab of the ribbon and click Sort & Filter, I also see an option for a Custom Sort.
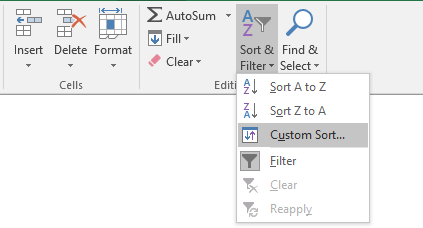
This brings up the Sort dialog, and in the Order setting, I see an option for Custom List.

Clicking this option brings up the Custom Lists dialog, and below I’ve selected the month abbreviation list that I want to sort by.
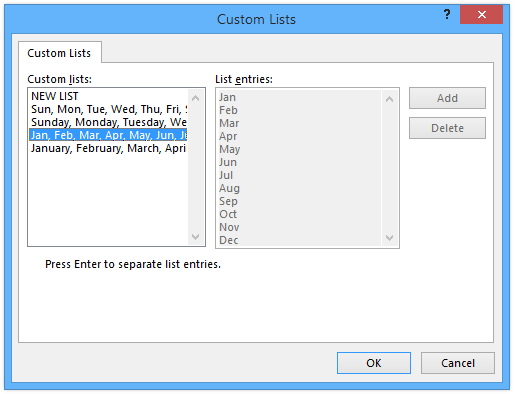
After clicking OK a couple times, now I’ve got my months sorted chronologically. And now, if I use the A to Z and Z to A sorts on this column, it remembers it’s associated with the list, and it sorts forwards and backwards by the same list.
To sort by a built-in list, I had to access the Custom Lists dialog. So how do I add a custom list?
Custom Lists
You can get to the Custom Lists dialog by clicking on the File tab of the ribbon, then clicking Options, then clicking Advanced in the dialog. Scroll way down, and almost at the bottom is the button for Edit Custom Lists.
This brings up the Custom Lists Dialog.
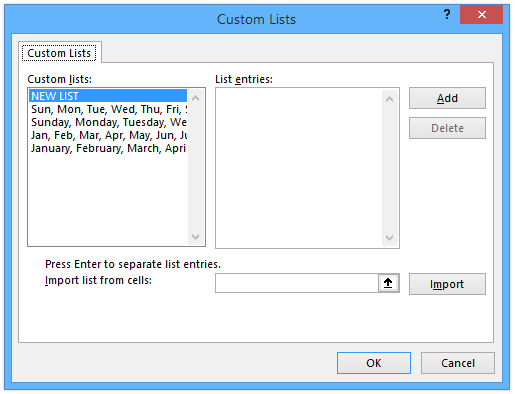
Click in the List Entries box, and start typing your list. Press Enter to separate list entries.
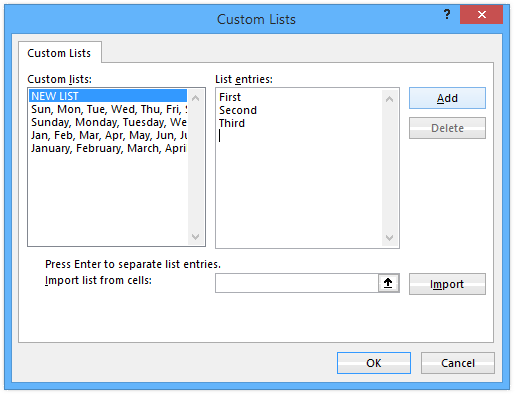
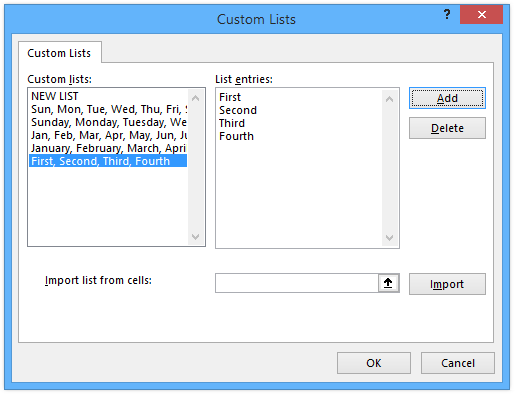
Click the Add button, and your list is added to the options. Note that the selected list is enumerated in the List Entries box. You can add, delete, and edit these entries, and click Add to save your changes.
If you select a range, then open up the Custom Lists dialog (via File > Options > Advanced), you can import the selection as a new list. The range is prepopulated in the box next to the Import button.

Clicking Import adds your range to the list. You can click the arrow button next to Import to add a list from another range.

The dialog now shows my usual setup with four custom lists: the Latin alphabet, the Greek alphabet, the military call signs used to communicate letters, and a list of counting numbers from 1 to 12. I find these useful when I’m doing a demo or workshop and I need to quickly generate a list of categories for a chart.
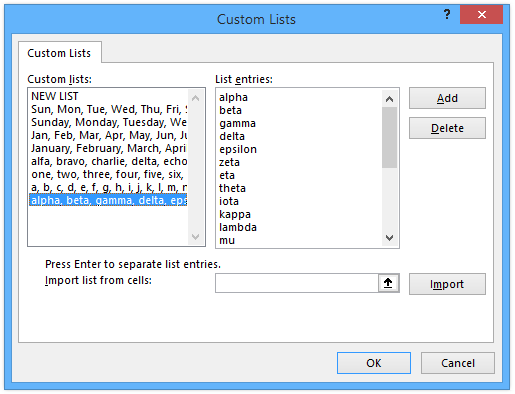
Whenever I set up Excel on a new computer, one of the first things I do is set up these custom lists. (I should write a post that details all of the first things I do when I set up a new account. Then I could read it and do everything, and not remember some things weeks later.) This usually entails opening a file that has these lists laid out in a worksheet. But even this seems to be too slow sometimes.
Custom List Manager
To facilitate the creation of my favorite custom lists, I built a little tool called the Custom List Manager (click on that link to download it). It’s a regular Excel macro-enabled workbook. A sheet called Built-In Lists will look familiar, because I took screen shots of it for earlier sections of this post. Another sheet called Custom Lists contains these lists:
A third sheet, called Sample Lists, has some lists you can play around with.
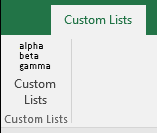
When you open the workbook, a new ribbon tab appears.
When you click the Custom Lists button on this tab, you get the following dialog. For each of my standard custom lists, there is a button to add it and another to remove it. Depending on whether the list is present, one or the other of these buttons is enabled. There is also a button which will add lists using columns of a range you’ve preselected.
Try out this little tool. The VBA code is unprotected so you can prowl around its inner workings. Let me know if you like it, and if you have any suggestions.
















 A small selection of my Excel book collection. My copy of RibbonX is falling apart!


