Peltier Technical Services, Inc.
 

Excel Chart Add-Ins | Training | Charts and Tutorials | Peltier Tech Blog


Peltier Tech Chart Utility


Interactive Chart Creation.

Choose on-the-fly where you want your chart to be drawn, and where to find the data you want to plot. InteractiveChartCreation.zip is a zipped Excel file with an easy demonstration of these steps.

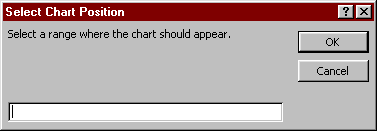
This floating command bar is created when the workbook is opened, and destroyed when the workbook is closed. Go to the Visual Basic Editor (Alt-F11) to see how. Details are in the ThisWorkbook Class Module and in the modMenu Code Module.

The Create A Chart button brings up two input boxes. The first asks the user to define a worksheet range where the chart is to be drawn:

The input box is opened by the following VBA command, which includes the prompt within the input box, the title of the input box, and the type of data being entered (type 8 means a worksheet range):

    Set myChtRange = Application.InputBox( _
        Prompt:="Select a range where the chart should appear.", _
        Title:="Select Chart Position", Type:=8)

The user selects this range by dragging the mouse. When the user clicks on Okay, the variable myChtRange is assigned to the selected range. The second input box asks the user to define another worksheet range (again with the mouse) that contains the data to be plotted:

The second input box is opened by this VBA command:

    Set myDataRange = Application.InputBox( _
        Prompt:="Select a range containing the chart data.", _
        Title:="Select Chart Data", Type:=8)

The variable myDataRange is assigned to the new area selected by the user. The chart is created in the desired range using the selected data range. These two ranges can be on any worksheets, in any workbooks.

Next the chart is created, using the location and dimensions of myChtRange:

    Set objChart = .ChartObjects.Add( _
        Left:=myChtRange.Left, Top:=myChtRange.Top, _
        Width:=myChtRange.Width, Height:=myChtRange.Height)

Finally, the new chart's source data is assigned to myDataRange:

    With objChart.Chart
        .SetSourceData Source:=myDataRange
    End With

In this last step a handful of other chart parameters are set. Go to the Visual Basic Editor (Alt-F11) to see these. Details are in the modChart Code Module.


Downloads

You can download the Interactive Chart Creation routine described above, and a similar Interactive Chart Resizer routine, from the convenient links below. Or you can scroll to the VBA listings below the links, copy the code, and paste it into a regular code module in the VB Editor.


The Procedures

This is the CreateChart procedure in the modChart Code Module of the InteractiveChartCreation.xls workbook.

Option Explicit

Sub CreateChart()
  Dim objChart As ChartObject
  Dim myChtRange As Range
  Dim myDataRange As Range
  With ActiveSheet
    ' What range should chart cover
    Set myChtRange = Application.InputBox( _
        prompt:="Select a range where the chart should appear.", _
        Title:="Select Chart Position", Type:=8)
    ' What range contains data for chart
    Set myDataRange = Application.InputBox( _
        prompt:="Select a range containing the chart data.", _
        Title:="Select Chart Data", Type:=8)
    ' Cover chart range with chart
    Set objChart = .ChartObjects.Add( _
        Left:=myChtRange.Left, Top:=myChtRange.Top, _
        Width:=myChtRange.Width, Height:=myChtRange.Height)
    ' Put all the right stuff in the chart
    With objChart.Chart
        .ChartArea.AutoScaleFont = False
        .ChartType = xlXYScatterLines
        .SetSourceData Source:=myDataRange
        .HasTitle = True
        .ChartTitle.Characters.Text = "My Title"
        .ChartTitle.Font.Bold = True
        .ChartTitle.Font.Size = 12
        With .Axes(xlCategory, xlPrimary)
            .HasTitle = True
            With .AxisTitle
                .Characters.Text = "My X Axis"
                .Font.Size = 10
                .Font.Bold = True
            End With
        End With
        With .Axes(xlValue, xlPrimary)
            .HasTitle = True
            With .AxisTitle
                .Characters.Text = "My Y Axis"
                .Font.Size = 10
                .Font.Bold = True
            End With
        End With
    End With
  End With
End Sub

This is the SizeTheChart procedure in the InteractiveChartResizer.xls workbook.

Option Explicit

Sub SizeTheChart()
  Dim objChart As ChartObject
  Dim myRange As Range
  With ActiveSheet
    ' Define the chart
    On Error GoTo ChartErrorHandler
    Set objChart = ActiveChart.Parent
    On Error GoTo 0
    ' What range should chart cover
    Set myRange = Application.InputBox(Prompt:= _
        "Select a range of cells the chart should cover.", _
        Title:="Select Chart Position", Type:=8)
    ' Resize the chart
    With objChart
        .Left = myRange.Left
        .Top = myRange.Top
        .Width = myRange.Width
        .Height = myRange.Height
    End With
  End With
Set myRange = Nothing
Exit Sub

ChartErrorHandler:
' MsgBox "Error " & Err.Number & ", " & Err.Description
If Err.Number = 91 Then
    MsgBox "Please select a chart, then try again", _
        vbOKOnly, "Select a Chart"
End If
Exit Sub
End Sub
 

Peltier Tech Chart Utility


Peltier Technical Services, Inc.

Excel Chart Add-Ins | Training | Charts and Tutorials | PTS Blog

Peltier Technical Services, Inc., Copyright © 2017. All rights reserved.
You may link to this article or portions of it on your site, but copying is prohibited without permission of Peltier Technical Services.

Microsoft Most Valuable Professional

Microsoft Most Valuable Professional

My MVP Profile